

Our in-boxes can be a pretty scary place. Emails are like bunnies – you blink and they’ve multiplied right before your eyes. I’ve found a system that makes my inbox a little less scary through using Gmail filters. I want to share this process with you so you can calm your inbox too.
Using Gmail’s filter function you can already have the less important emails out of your inbox before you ever open it for day. This means your inbox will only have those most important emails that you need to deal with right away. Less time sorting means more time for other things!
It’s best to filter messages that don’t need your attention immediately. For example, I filter all email lists that I sign up and Facebook messages. I want to see these messages eventually, but they are not first priority when I open my inbox. What to filter will likely be different for you than it is for me, based on your business priorities.
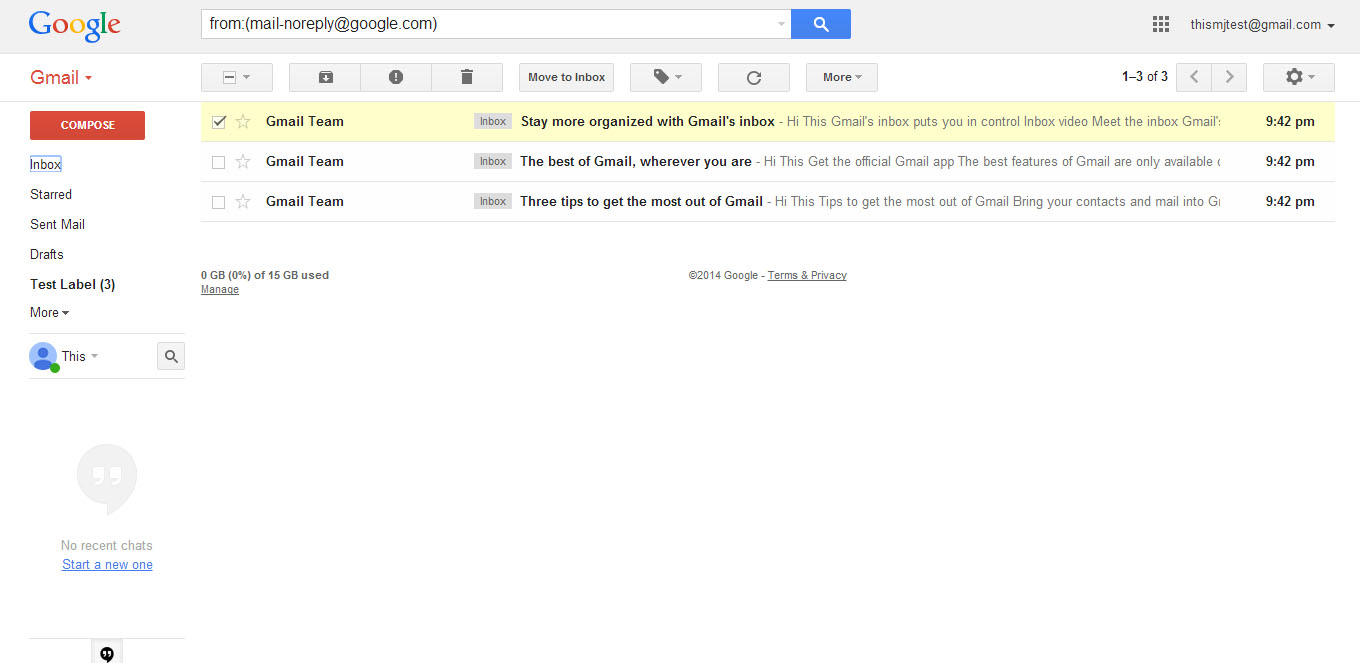
1. Select an email from a sender that you want to begin filtering. (Note: You can also filter by different criteria such as subject or who the message is sent to, but I find the sender to be the way I usually choose what I want to filter.)
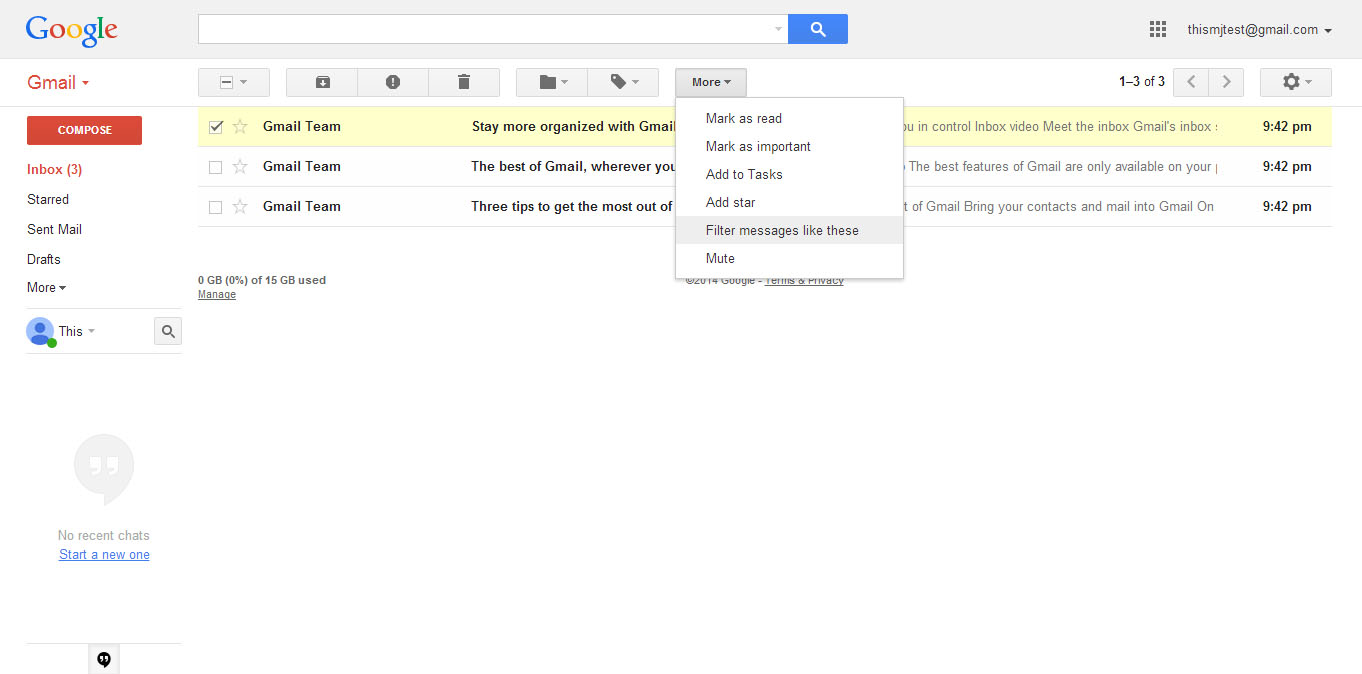
2. Click “More” and then “Filter Messages Like These”
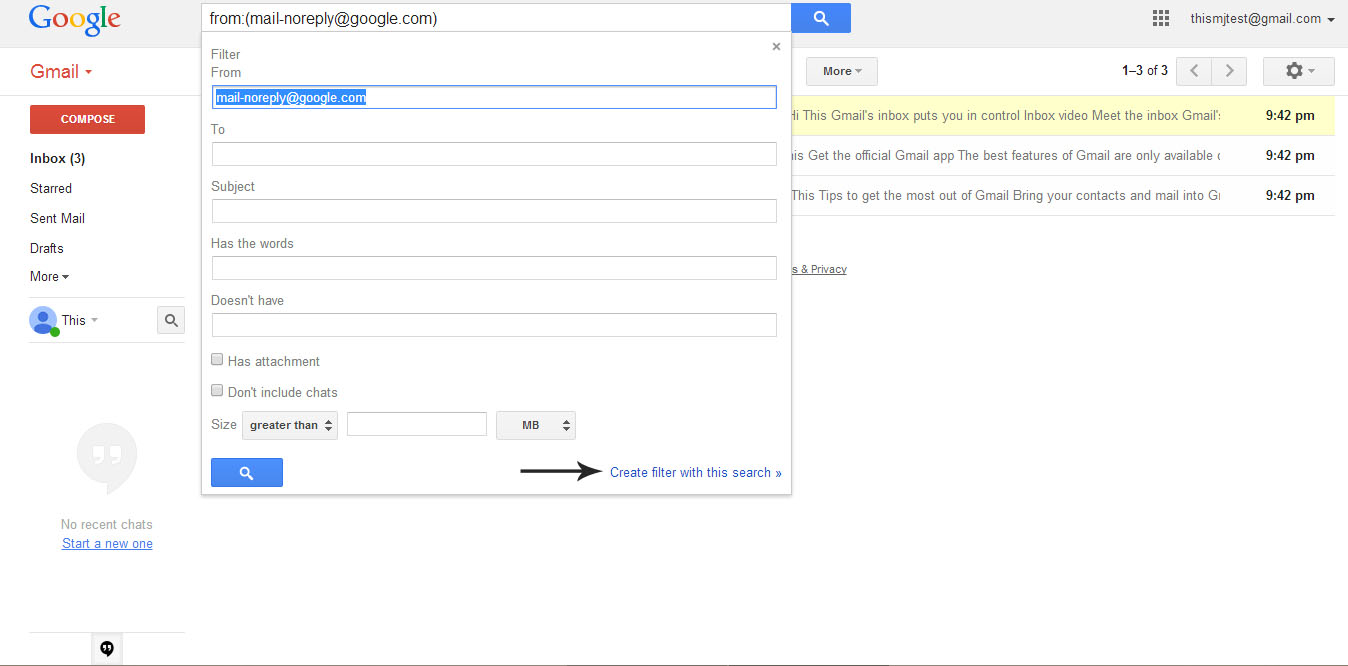
3. At this point Gmail will try to choose what you want to filter. Take a look at these settings and make sure it matches your criteria. As you see, there are a lot of options, but I usually keep it short and sweet.

4. Click “create filter with this search”.
5. Decide what you want the filter to do. To have it removed from your inbox, be sure to click “Skip the Inbox (Archive It)”. I usually also apply a label for the messages (Email Lists or Facebook for example) so that I can easily find and read these messages when I have more time. You can choose to do other things with the email if you prefer, such as Star it for backup or delete it.
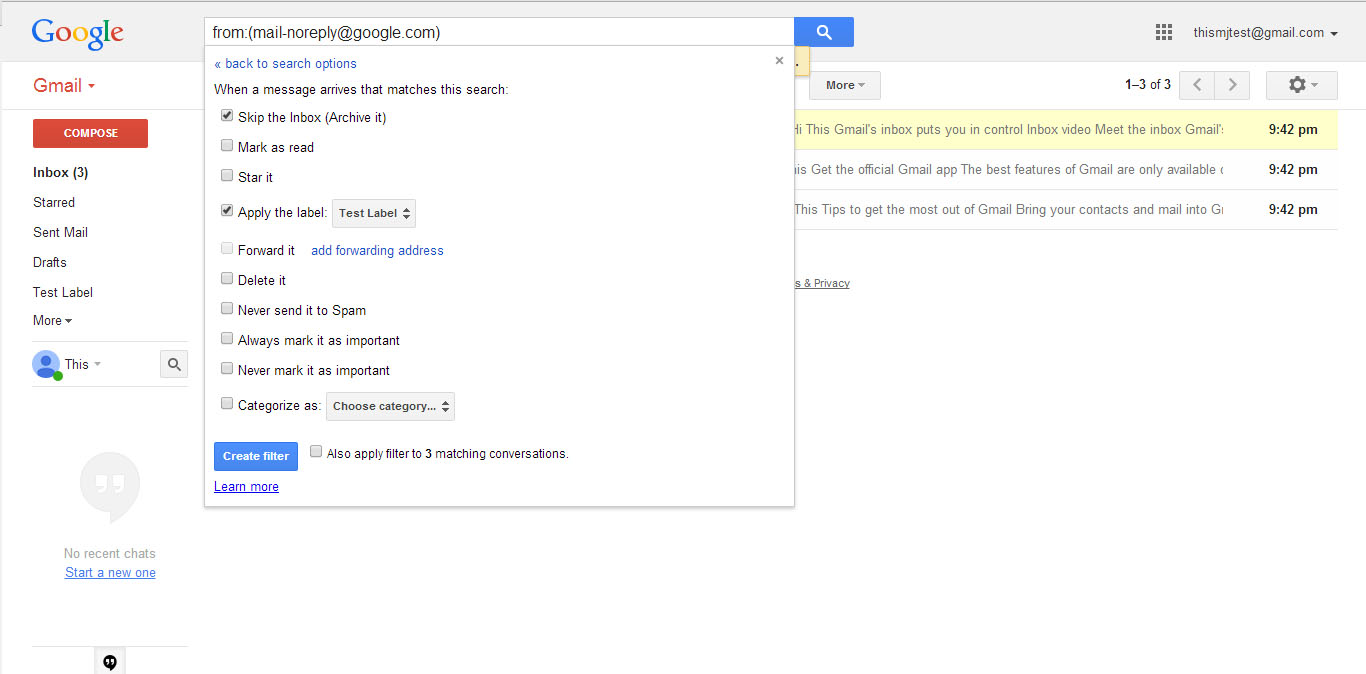
6. Click “Also apply filter to…” to have the current messages in your inbox filtered to this criteria.
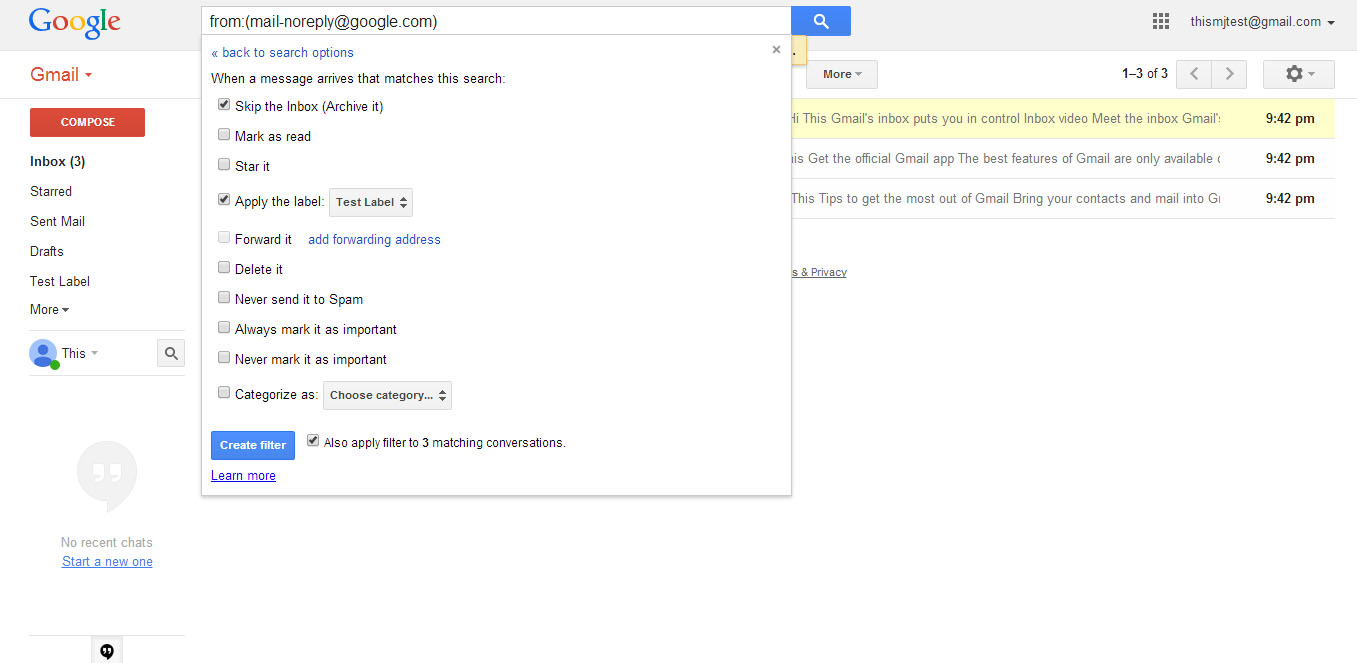
7. Click “Create filter”.
Congratulations! You’ve created your first filter – easy as that! Your messages will now be automatically filtered based on your criteria and no longer a clutter in your inbox. You may notice that some similar emails pop through into your inbox. Usually this happens when a copy changes their emails address or uses multiple email addresses. Simply create another filter and those messages will be filtered as well.
Just not enough time to set up these email filters yourself? I’d love to help!